3.2. Agent workflow. Tickets
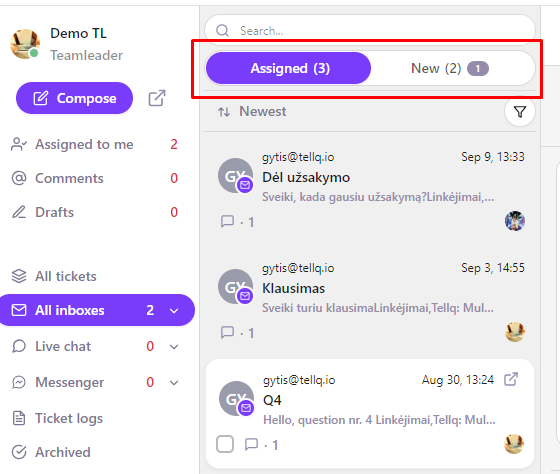
All received tickets are divided into two parts:
• Assigned: tickets that have already been assigned to a specific agent but have not yet been archived;
• New: new, unprocessed tickets that are not assigned to any agent:
1.1. Assign ticket: To perform any actions with the received ticket, you first need to assign it to yourself (click 'Assign to me'):
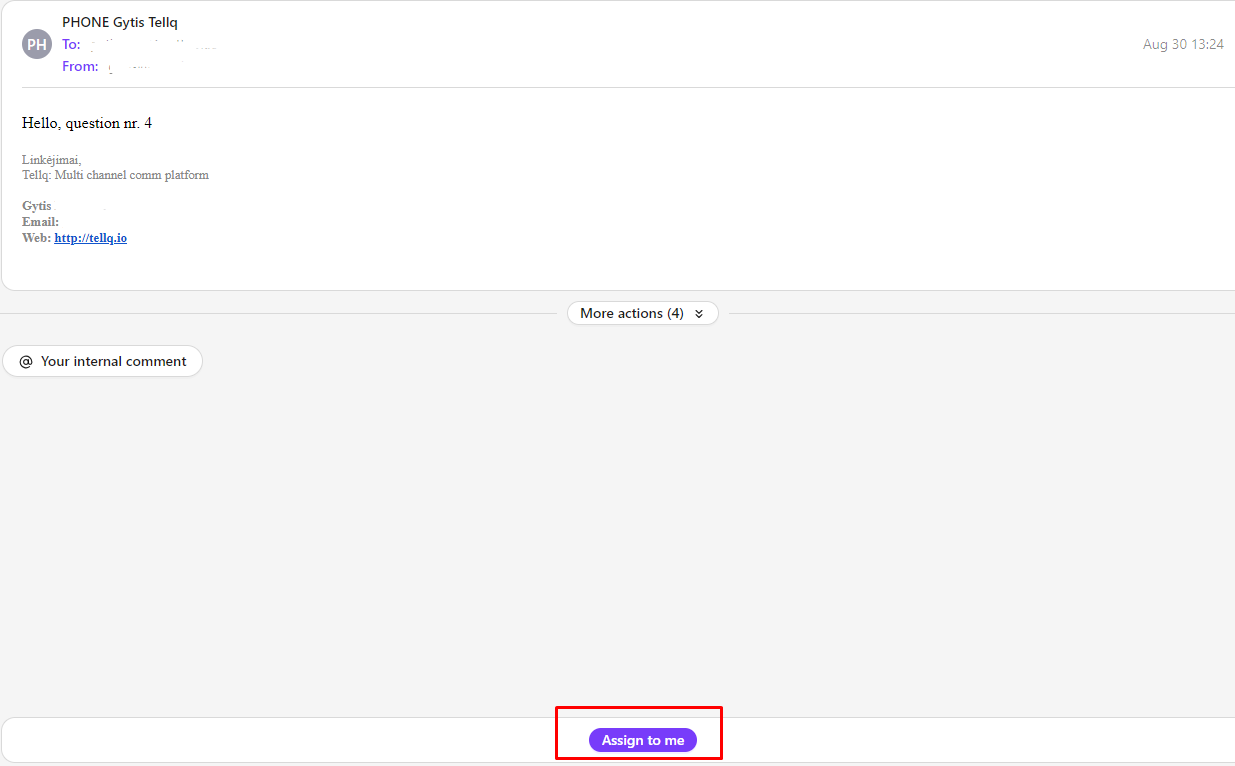
Once you assign the email to yourself, the client's inquiry is automatically moved from the 'New' section to the 'Assigned' section.
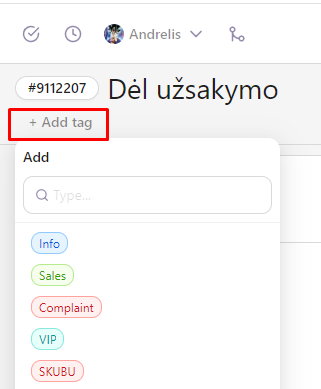
1.2. Tags: After assigning the email to yourself or another person, you can assign a tag to the email based on the relevant team for easier inquiry management. You can select one tag or multiple tags, depending on your needs:
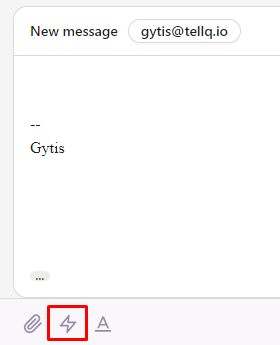
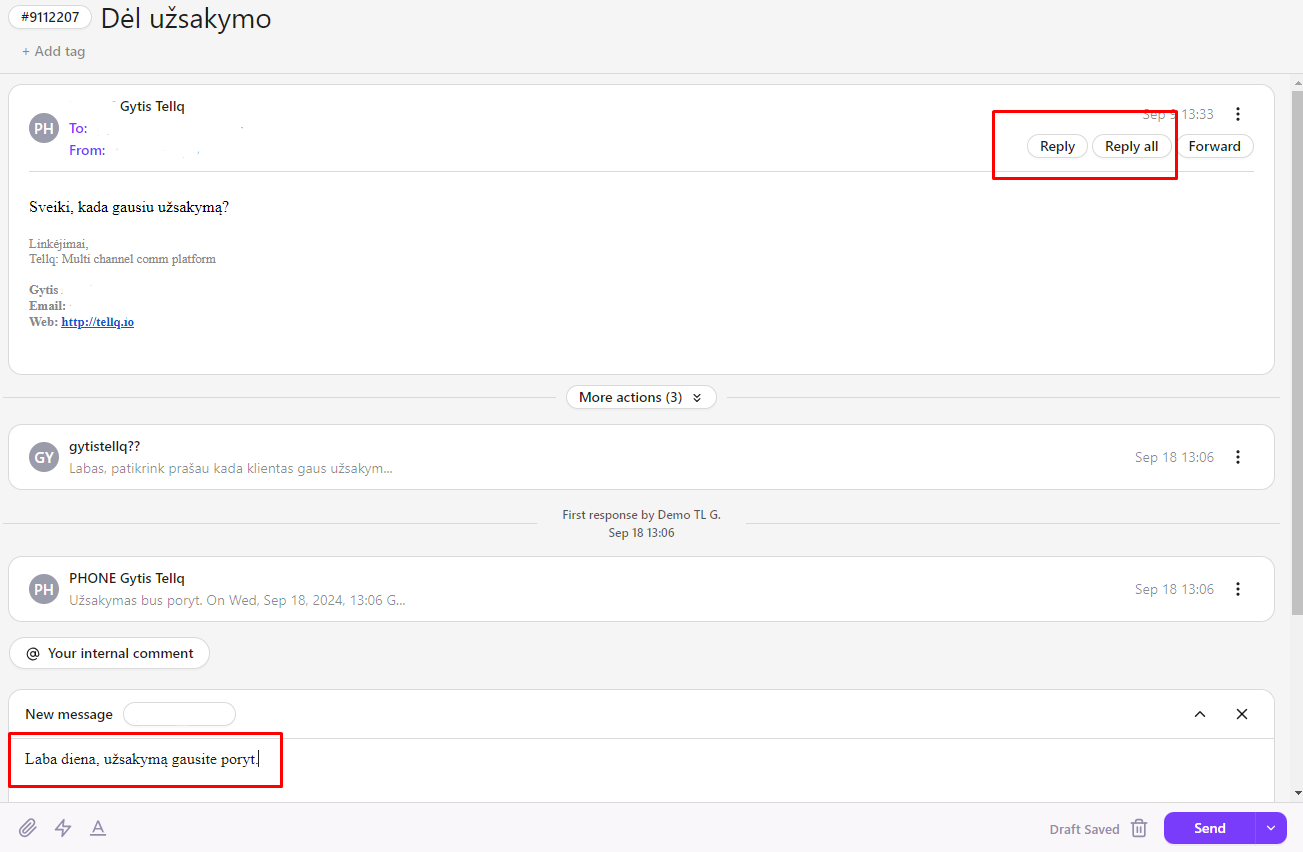
1.3. Reply / Reply all / Forward: After completing the previously mentioned steps, you can see the usual email functionalities: reply / reply all / forward. Choose the desired action – reply to the client or forward the email to others:

Important! If you have a long conversation and want to reply to a specific email, click Reply on the right side of the desired message -> then you will respond specifically to that email:
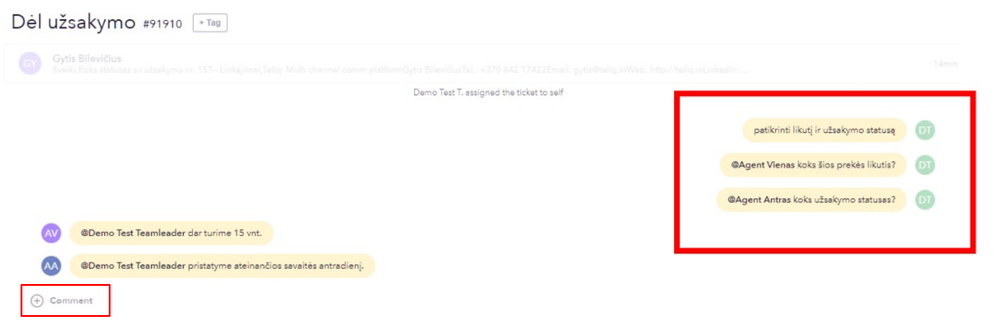
1.4. Comments: In addition to the mentioned functions, you can also use the commenting feature (Comments). These comments are visible only to company employees and are not accessible to the client. You can use comments to note relevant information. Additionally, you can tag a colleague by pressing '@', and they will receive a notification that they have been mentioned in a specific email that requires their attention or a task you assigned. If you are mentioned in a response (also with the '@' symbol), you will also receive a notification:
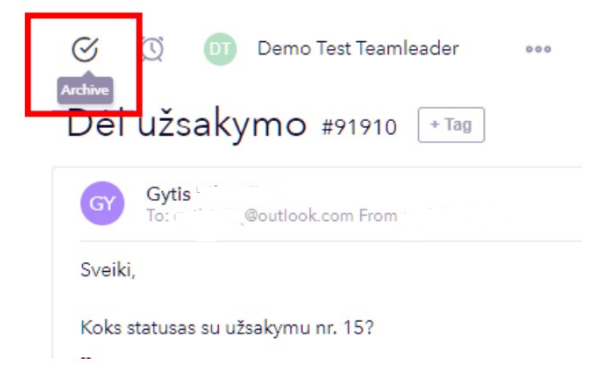
1.5. Archive: After finishing work on a specific email (replying to the client / forwarding the email), press the archive icon. The email will disappear from the general list in the 'Assigned' section and will move to the 'Archived' section, allowing you to work on another client's inquiry:
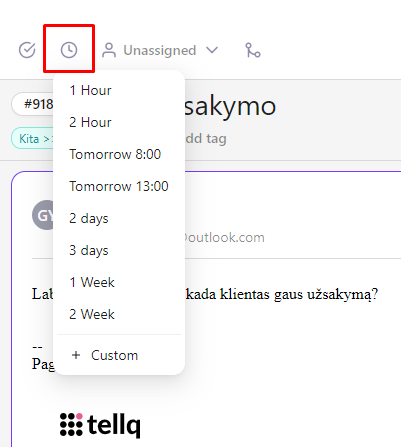
1.6. Snooze: While working with tickets, you can also choose the 'Snooze' function – in this case, the email will disappear from the general list in 'Assigned' and will reappear after the time period you set:
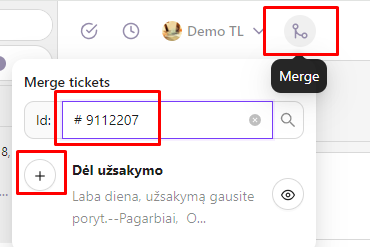
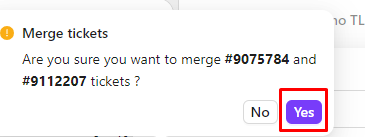
1.7. Merge: If you receive a client's response that comes as a new email, you can merge these emails.
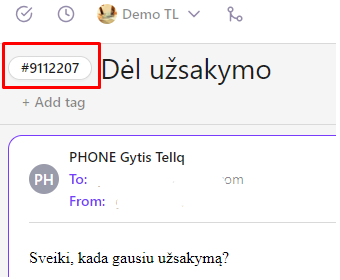
- Select the email to which the following email will be added and click on the email ID to copy the email ID:
- Select the email you want to add to the previously marked ticket. Click the 'Merge' icon, enter the email ID, and press the + symbol:
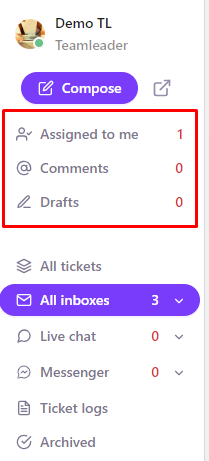
2. Filters and search: You can filter tickets by several different sections visible in the system:
• Assigned to me: Tickets assigned to you;
• Comments: Tickets in which you are mentioned;
• Drafts: Drafts that you have started writing but not finished;
• All inboxes: You can see inquiries from clients across all channels you serve. Additionally, you can filter inquiries from each individual inbox;
• Tags: Filtering inquiries by subject:
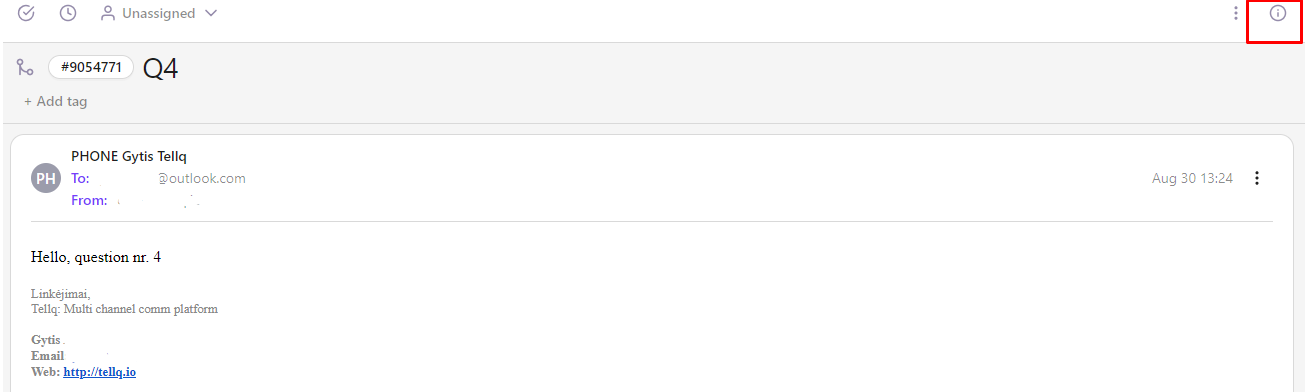
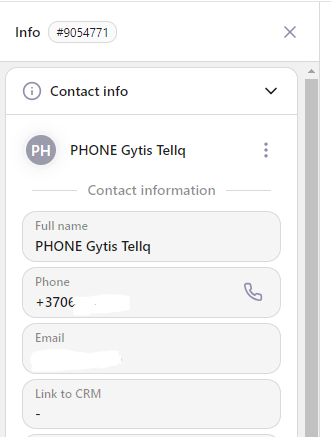
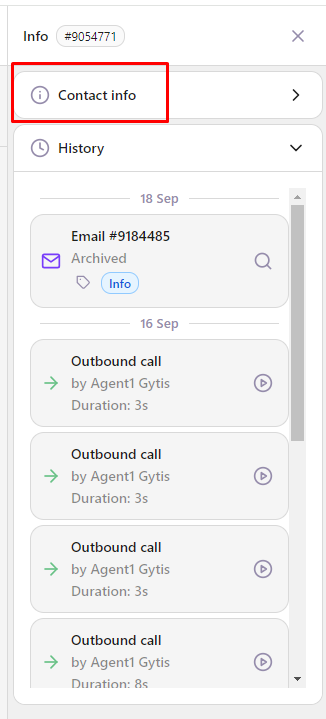
3. Client contact and communication history: In the general client inquiry window, you will always see the 'i' symbol on the right side. By clicking on the 'i', you can view the client's contact information and the history of their different questions:
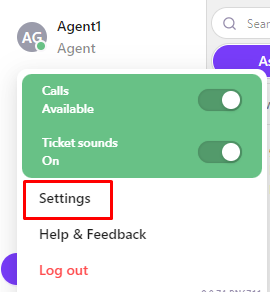
4. Personal settings:
4.1. In the main TELLQ Multi window, click on Settings:
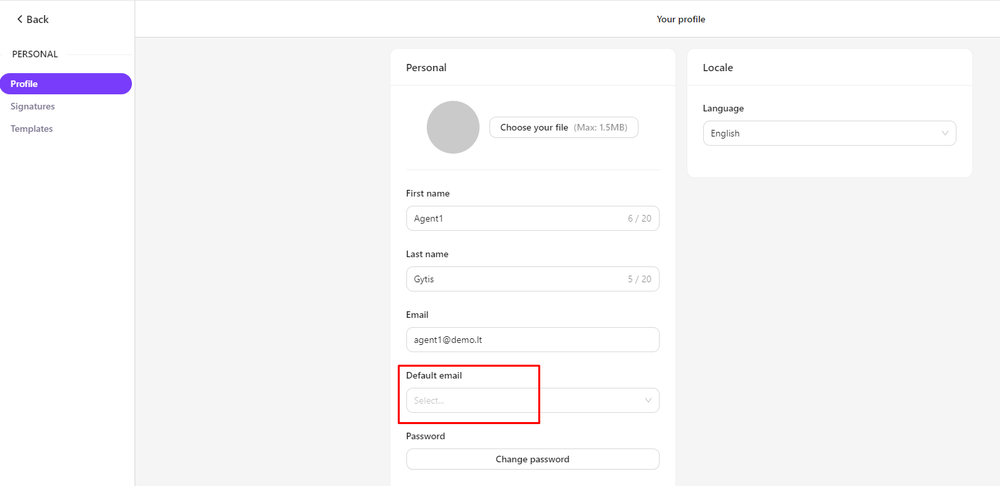
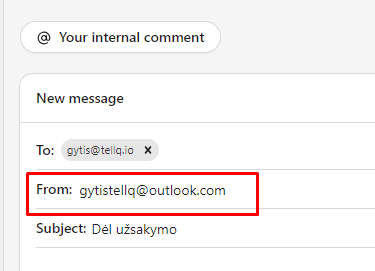
4.2. In the Profile section, update your personal information and login details. During your first login, we recommend changing your account password. Also, if you reply to most emails from the same email address, you can choose which email will be automatically set as the default 'From' address when responding to client questions:
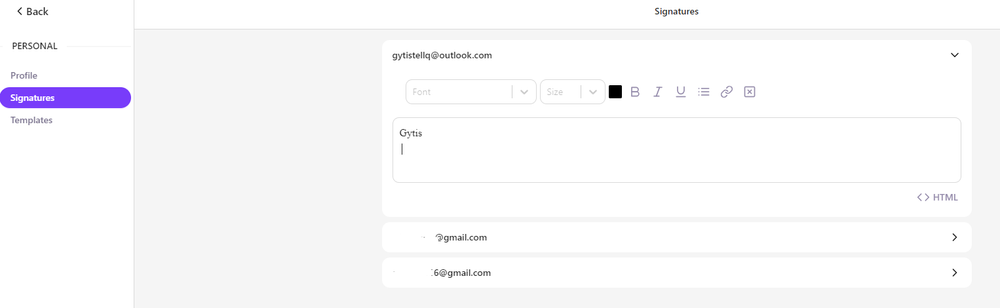
4.3. In the Signatures section, you can create different signatures for your account. You can use different signatures for the various email inboxes you manage:
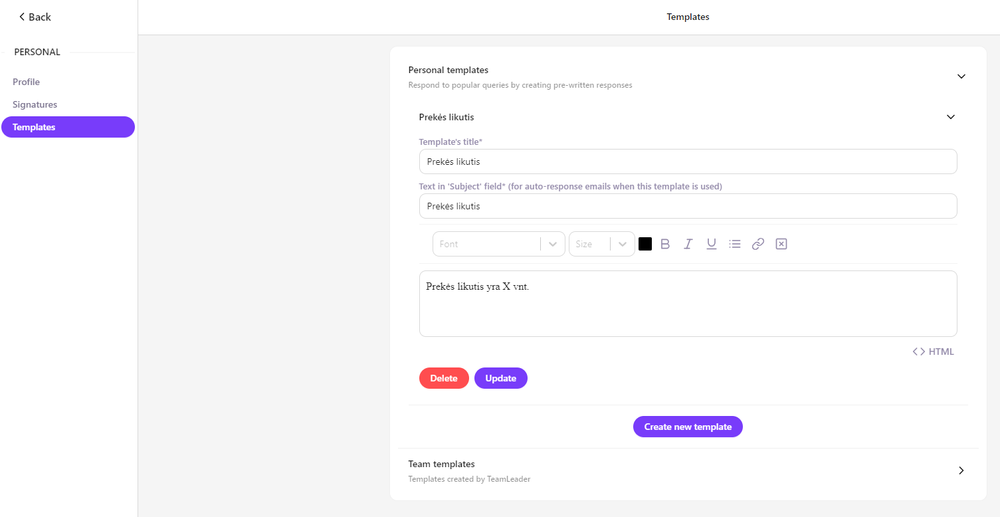
4.4. In the Templates section, you can create frequently used email templates, which you can access with a single click when composing an email: